
Microsoft Word Online (part of Microsoft 365) has transformed from a “light” version of the desktop app into a powerhouse for real-time collaboration. In this comprehensive article, I will walk you through a playbook for collaborating in Word Online. We’ll cover everything from permission management to advanced co-authoring etiquette.
Word Online Collaboration Tips
1. The Foundation: Strategic Sharing and Permissions
Before a single word is typed, collaboration starts with how you invite others into your digital space.
Understanding the Permission Hierarchy
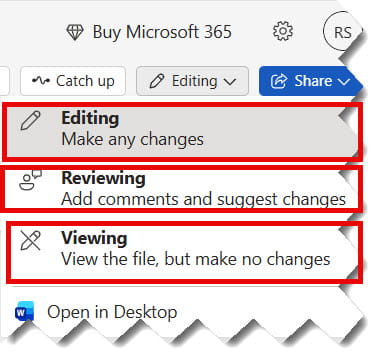
| User Role | Best For… | Capabilities |
| Can Edit | Co-authors, Subject Matter Experts | Full control over text, formatting, and structure. |
| Can Review | Legal teams, Senior Executives | Limited to Track Changes and Comments; cannot delete original text. |
| Can View | Stakeholders, Clients | Read-only access; perfect for final presentations or policy docs. |
How I Secure My Documents
To share securely, I always follow these steps:
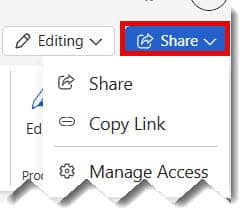
- Click the Share button in the top right corner.
- Select Link Settings.
- Pro Tip: For sensitive corporate data, I never use “Anyone with the link.” I always restrict access to “People in [Company Name]” or “Specific people.”
- Always set an Expiration Date if you are working with external vendors or temporary contractors. Check out the screenshot below for your reference.
2. Real-Time Co-Authoring
One of the most impressive feats of Word Online is seeing the “presence” of your colleagues.
Managing Multiple Cursors
While Word Online handles “locking” paragraphs well, things can get messy if two people try to edit the same sentence simultaneously.
- Look for the Presence Indicator: In the top right ribbon, you’ll see icons for everyone currently in the file.
- The Paragraph Lock: When I see a colleague’s cursor in a paragraph, I move to a different section. Word technically locks the block of text they are working on to prevent data conflicts.
- Catch Up: If I’ve been away from the document for a few hours, I use the “While you were away” feature. It highlights the specific changes made by others since my last session.
3. Communication Within the Document: Comments and @Mentions
Effective collaboration isn’t just about writing; it’s about the conversation around the writing.
The Power of the @Mention
If I need someone to verify a specific statistic in a white paper, I don’t send him/her a Slack message with a link. I highlight the text and @mention her directly in a comment.
- Automated Notifications: When I type
@JenniferMiller, Microsoft 365 sends her an automated email with a “Go to comment” button. - Assigning Tasks: You can now “Assign as Task” when @mentioning. This creates a checklist item that Jennifer must “Resolve” before the document is considered complete.
- Threaded Conversations: Keep the chat organized. Always reply to an existing comment thread rather than starting a new one for the same topic.
4. Reviewing Like a Pro: “Reviewing” Mode vs. “Editing” Mode
- Track Changes: In Reviewing mode, every deletion becomes a strikethrough and every addition is highlighted in a unique color.
- Transparency: This allows the document owner to see exactly what I’m thinking. They can then “Accept” or “Reject” my suggestions one by one.
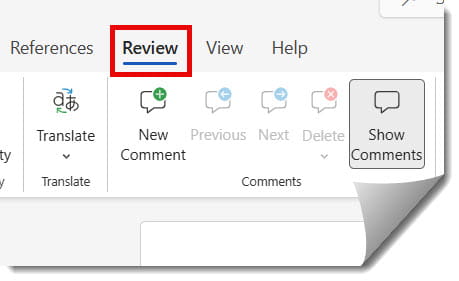
- The “Review” Tab: I use the Review tab to navigate through changes using the “Next” and “Previous” buttons. It’s the most efficient way to scrub a 50-page document.
5. Version History
Because Word Online saves automatically (AutoSave), every tiny change is logged.
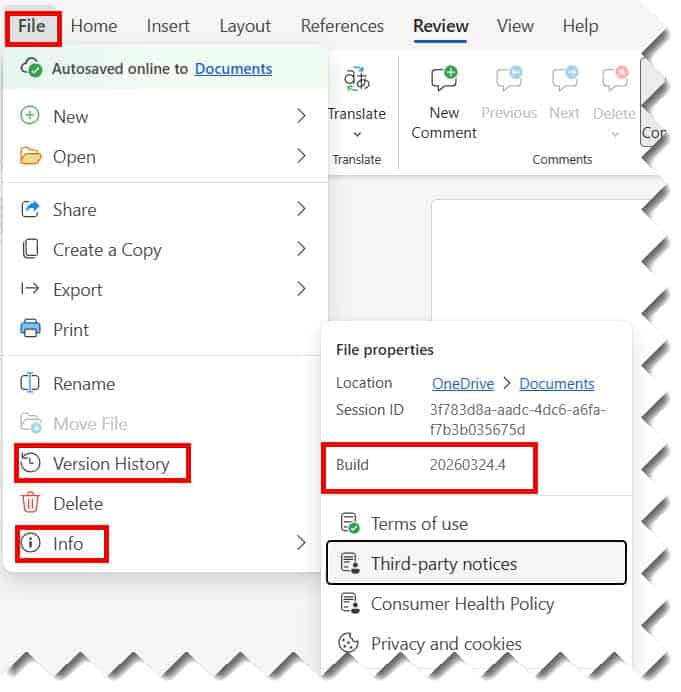
- Go to File > Info > Version History.
- A panel appears on the right showing a timeline of who edited the doc and when.
- I can click through past versions to see what the document looked like at 10:00 AM versus 4:00 PM.
- Restore Point: If someone accidentally deleted an entire section, I simply click “Restore” on the previous version to bring it back.
6. Using “Draft with Copilot” for Collaborative Brainstorming
If your organization has enabled AI features, Microsoft Copilot in Word Online is the ultimate “silent collaborator.”
- Collaborative Prompts: My team and I will often sit on a Microsoft Teams call, share the screen, and prompt Copilot together: “Rewrite this section to be more professional for our New York client base.”
- Summarization: When a new team member joins a project late, I have Copilot summarize the 20-page document so they can get up to speed in seconds.
7. Best Practices for Professional Collaboration
- Never Resolve Someone Else’s Comment: Unless you are the project lead, let the person who asked the question click the “Resolve” button once they are satisfied with the answer.
- Use Descriptive File Names: Avoid “Doc1.” Use a standard format:
[ProjectName]_[Client]_[Status]. - Notify Before a Major Overhaul: If you plan on deleting 5 pages of content, send a quick @mention or a message first. Don’t let your collaborators wake up to a “massacre” of their hard work.
- Clean Up Before Finalizing: Before sending a link to a client, I always do a “Comment Sweep”—ensure all tasks are resolved and all track changes are accepted/rejected.
8. Summary Checklist for Your Next Collaborative Session
- Is the document saved in OneDrive or SharePoint? (Required for co-authoring).
- Have you set the correct Permissions (Edit vs. View)?
- Is AutoSave toggled ON in the top left corner?
- Have you communicated the “Reviewing” vs. “Editing” expectations to the team?
- Are you prepared to use @mentions to keep the conversation focused?
Conclusion:
Collaboration in Word Online is about more than just typing in the same box. By implementing the permissions strategies, communication habits, and reviewing workflows I’ve outlined above, you will position yourself as a proficient leader.
You may also like the following articles:

My name is Carissa Gudino and I am an expert in word online, using Word Online in my day-to-day tasks. In this blog, I will share with you tips and tutorials on how to use word online to its fullest potential. I work for various clients in various countries like the United States, Canada, the United Kingdom, Australia, New Zealand, etc. My tutorials are designed to help beginners, as well as more experienced users, learn new tricks and tips on Microsoft word online. Check out more.