
Knowing how to create a document in Word Online (part of the Microsoft 365 suite) is no longer a “nice-to-have” skill; it is the standard for collaborative, fast-paced business environments. In this comprehensive article, I will walk you through the process from a professional’s perspective.
How To Create Document In Word Online
Why Choose Word Online Over the Desktop App?
In my experience, many users in the market still reflexively reach for the desktop version of Word. While the desktop app has its place for heavy-duty formatting, Word Online offers advantages that are hard to beat in a “work-from-anywhere” world.
- Real-Time Collaboration: You can see your colleague, perhaps someone typing in the same paragraph as you, simultaneously.
- Auto-Save Peace of Mind: The “Save” button is a relic of the past. Every keystroke is saved to OneDrive instantly.
- Accessibility: Whether you are on a Chromebook at a coffee shop or a library computer, your documents are exactly where you left them.
- Version History: Ever accidentally deleted a page and realized it three hours later? Word Online allows you to roll back to any previous version with a few clicks.
Step 1: Accessing the Microsoft 365 Portal
To create a document, you first need to enter the ecosystem. Microsoft has made this incredibly streamlined for US users.
- Navigate to the Portal: Open your preferred browser and go to
Office.comorOneDrive.com. - Sign In: Use your Microsoft account credentials. If you are working for a corporation, this is likely your work email (e.g.,
samantha.jones@techcorp-usa.com). - Locate the App Launcher: In the top-left corner, you’ll see the “Waffle” icon (nine dots). Click it and select Word. Check out the screenshot below for your reference.

Step 2: Creating Your First Document
Once you are on the Word landing page, you have two primary paths to start your project.
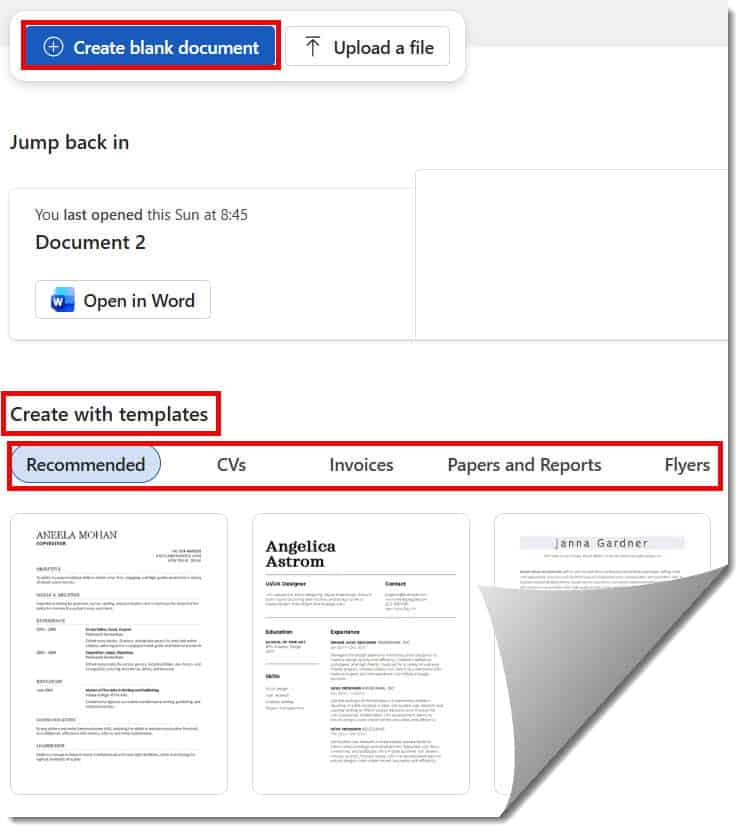
Option A: The Blank Document
This is for the purists. If you have a clear vision and want a clean slate, click New blank document. This opens a fresh canvas with default margins and Calibri or Aptos fonts.
Option B: Leveraging Premium Templates
Microsoft provides a library of templates specifically tailored to the American professional landscape.
- Resumes and Cover Letters: Designed to pass through modern Applicant Tracking Systems (ATS).
- Business Proposals: Pre-formatted with professional headers and tables of contents.
- APA/MLA Style Papers: Essential for students at universities from UCLA to Harvard.
Step 3: Mastering the Online Ribbon and Interface
The Word Online interface is a “ribbon” style, similar to the desktop version but simplified for web performance.
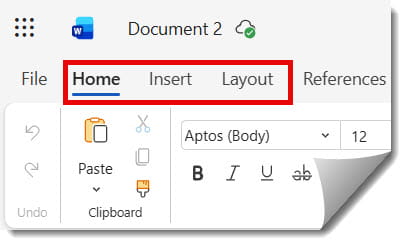
The Home Tab
This is where 80% of your work happens. Here, you manage your Styles. As an authority on document design, I cannot stress this enough: Use the Styles gallery. Don’t just bold your text and increase the font size for a heading. Use the “Heading 1” and “Heading 2” tags. This makes your document accessible and allows for the automatic generation of a Table of Contents later.
The Insert Tab
Word Online allows you to pull in dynamic content easily:
- Tables: Essential for data comparison.
- Pictures: You can insert images directly from your “OneDrive” or “Bing Pictures” (Stock Images).
- Links: Essential for digital reports. Use the shortcut
Ctrl + Kto quickly hyperlink text.
The Layout Tab
This is where you handle the “bones” of your document.
- Margins: Standard US Letter size is 8.5″ x 11″ with 1-inch margins.
- Orientation: Switch between Portrait for memos and Landscape for wide charts.
Step 4: Collaboration and Sharing Settings
The true power of Word Online is in its sharing capabilities. When I’m working on a project with a team, I don’t send email attachments. I send a link.
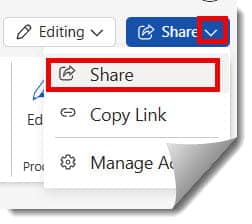
- Click the Share button in the top-right corner.
- Permissions Matter:
- Anyone with the link: Great for public viewing, but risky for sensitive data.
- People in [Your Organization]: The standard for internal US corporate use.
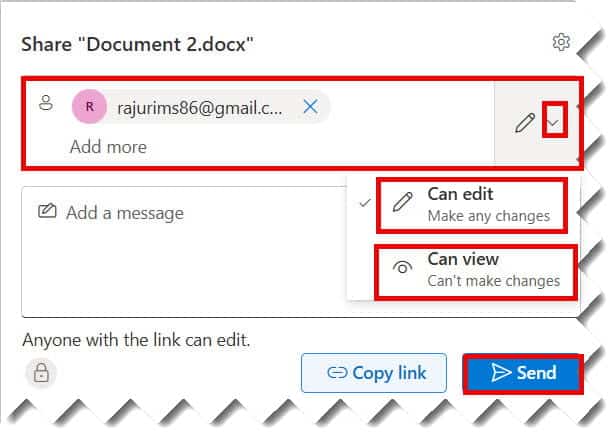
- Specific People: The most secure method. Enter an email like
michael.smith@agency.org.
- Choose Access Level: Select “Can Edit” for collaborators or “Can View” for final reviewers.
| Sharing Level | Best Use Case | Security Risk |
| View Only | Distribution of a final policy or newsletter. | Low |
| Review/Comment | Peer review and editing without changing the core text. | Medium |
| Full Edit | Active co-authoring on a draft. | High (Internal only) |
Step 5: Using “Review” and “Track Changes”
In a professional setting, you never want to overwrite a colleague’s work without a trail.
- Comments: Use these to ask questions like, “Hey Sarah, can we verify these Q3 projections?”
- Track Changes: When this is toggled on, every deletion and addition is highlighted. You can then Accept or Reject these changes individually.
- Editor: This is Microsoft’s AI-powered proofreading tool. It goes beyond basic spellcheck to suggest clarity improvements and check for formal tone—vital for high-stakes American business communication.
Step 6: File Management and Naming Conventions
One mistake I see all the time is a OneDrive full of files named “Document 1,” “Document 2,” and “Final Final V3.”
Professional Naming Strategy
Click on the file name in the top title bar (it usually defaults to “Document”). Rename it using a clear convention:
YYYY-MM-DD_ProjectName_Status_Author
Example: 2026-03-25_MarketingStrategy_DRAFT_Johnson
Saving and Downloading
While Word Online saves automatically to the cloud, you may need a local copy for a client or for offline use.
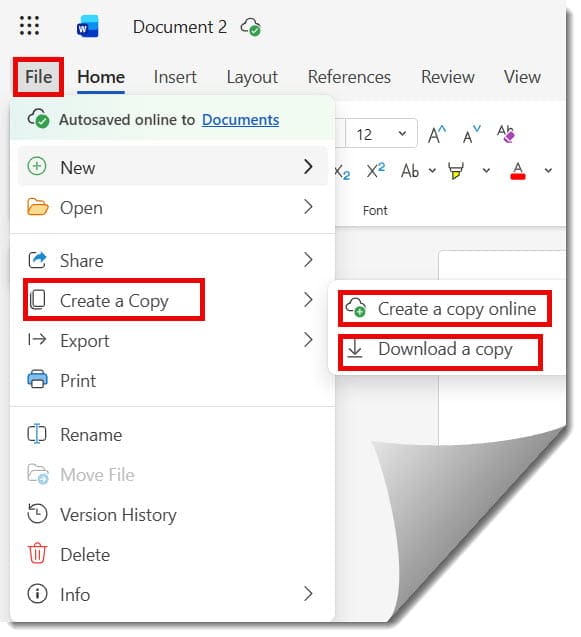
- Go to File > Create a Copy.
- Download a Copy: Saves a
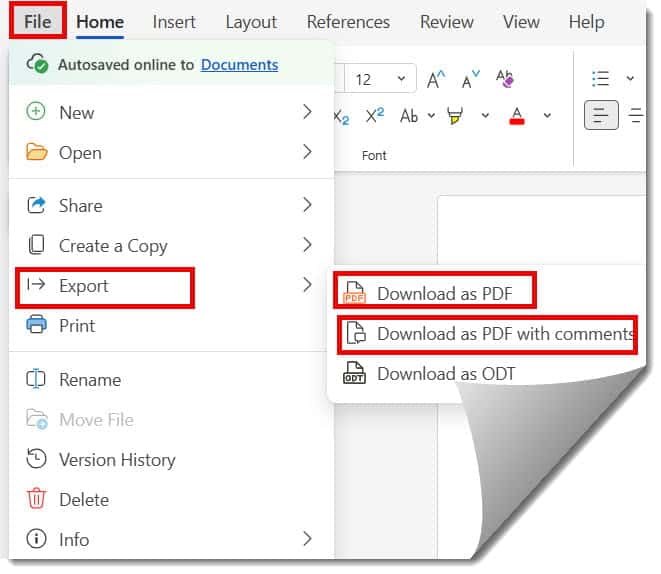
.docxfile to your computer. - Download as PDF: The gold standard for sending non-editable final versions to clients in California or abroad. Check out the screenshot below for your reference.
Step 7: Advanced Features (The Expert Edge)
To truly show your authority in Word Online, you should be familiar with these “hidden” gems:
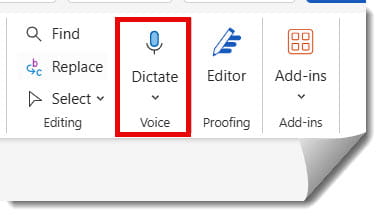
- Dictate: In the Home tab, use the Dictate button. Microsoft’s voice-to-text has become incredibly accurate. I often use this to “brain dump” my first draft while walking around my office in Silicon Valley.
- Search/Tell Me: The search bar at the top isn’t just for finding words; it’s for finding features. Type “Insert Page Number,” and it will show you the exact button to click.
- Integration with Teams: Most US enterprises use Microsoft Teams. You can open your Word Online document directly within a Teams channel, allowing for a chat sidebar alongside your writing.
Check out the screenshot below for your reference.
Best Practices for Professional Documents
When creating documents for a US audience, keep these cultural and professional standards in mind:
- Font Choice: Stick to professional, sans-serif fonts like Aptos (the new Microsoft default), Arial, or Segoe UI. Avoid “fun” fonts for business.
- Conciseness: US business culture values brevity. Use bullet points and headers to make your document “scannable.”
- Accessibility: Use alt-text for images and high-contrast colors. Many US government and large corporate contracts now mandate “Section 508” compliance for digital documents.
- Consistency: Ensure your “Normal” style is consistent throughout. Nothing looks more unprofessional than three different shades of black text in one proposal.
Summary and Key Takeaways
Creating a document in Word Online is a straightforward process, but doing it professionally requires attention to detail and a mastery of the cloud environment. By moving your document to the web, you gain security, flexibility, and the ability to collaborate across time zones with ease.
Quick Checklist for Your Next Document
- Sign in to Microsoft 365 and launch Word.
- Choose a template or a blank doc.
- Use Styles (Heading 1, Heading 2) for structure.
- Set your permissions correctly before sharing.
- Rename the file using a clear naming convention.
- Run Editor to catch any grammar or tone issues.
You may also like the following articles:
- How To Open Word Online In Browser
- Word Online Tutorial For Beginners
- How To Use Word Online For Free
- Word Online vs Office 365

My name is Carissa Gudino and I am an expert in word online, using Word Online in my day-to-day tasks. In this blog, I will share with you tips and tutorials on how to use word online to its fullest potential. I work for various clients in various countries like the United States, Canada, the United Kingdom, Australia, New Zealand, etc. My tutorials are designed to help beginners, as well as more experienced users, learn new tricks and tips on Microsoft word online. Check out more.