
In this comprehensive tutorial, I will walk you through exactly how to find, customize, and maximize calendar templates using Microsoft Word Online.
Word Online calendar template
Why Choose Word Online for Calendar Management?
Many people automatically reach for Excel or dedicated calendar apps. While those tools have their place, Microsoft Word Online provides distinct advantages for specific scheduling workflows:
- Unmatched Text Flexibility: If your calendar entries require detailed notes, hyperlinks, or specific text formatting, Word handles typography and spacing much more elegantly than narrow spreadsheet cells.
- Zero-Install Cloud Access: You do not need to worry about software versions or local files. It runs completely in your web browser, automatically saving every change you make to OneDrive.
- Seamless Collaborative Sharing: You can invite colleagues to view or edit your document simultaneously, turning a static template into a living, real-time team agenda.
Step-by-Step Tutorial: Sourcing and Opening a Calendar Template
Let’s walk through the foundational setup. To ensure your formatting remains crisp and responsive, you want to use the native template library built directly into the Microsoft 365 cloud ecosystem.
Step 1: Accessing the Portal
Open your preferred web browser and navigate to the official Microsoft 365 login page. Sign in using your corporate or personal Microsoft account credentials. Once your dashboard loads, click the Word icon in the left-hand application navigation bar.
Step 2: Browsing the Built-In Gallery
Instead of clicking “New blank document,” cast your eyes to the right side of the screen and click on More templates. This opens Microsoft’s centralized cloud library.
Step 3: Isolating Calendar Layouts
In the search bar provided within the template gallery, type Calendar and hit enter. The cloud engine will instantly filter down the available options, surfacing a variety of layouts including:
- Single-month planning grids
- Academic semester trackers
- 12-month multi-page annual overviews
- Weekly shift schedules
Select the design that matches your organizational style. Clicking it will automatically provision a new document instance inside your OneDrive account and open the Word Online editing interface.
Core Comparison: Selecting the Right Layout Architecture
Before diving into design customization, it is crucial to pick an architecture that matches your specific workflow needs. In the table below, I have broken down the primary template structures you will encounter in Word Online to help you make an informed decision.
| Template Architecture | Best Used For | Primary Advantage | Structural Limitation |
| Grid-Based Monthly | Editorial calendars, corporate event planning, high-level milestone tracking. | Traditional, intuitive layout; easy to visualize date distributions at a glance. | Limited vertical space for days crowded with more than 4-5 distinct items. |
| List-Based Weekly | Detailed daily agendas, technical training tracks, micro-task management. | Massive text capacity per day; ideal for long descriptions and nested bullet lists. | Loses the “macro” perspective of the month; requires more scrolling. |
| Multi-Column Academic | Shift scheduling, cross-department tracking, content pipelines. | Clear separation of responsibilities or themes across parallel tracks. | Can feel visually cramped on smaller laptop screens or mobile devices. |
Customizing Your Calendar Grid Design
Once your template is open, it’s time to make it functional. Native templates in Word are built using highly stable table grids. This means you have precise control over cell formatting, shading, and row distribution without breaking the document structure.
Applying Corporate and Aesthetic Themes
If the default template colors don’t match your company branding or personal workspace aesthetic, you can change them globally in just a few clicks:
- Click anywhere inside the calendar grid to activate the hidden Table Design tab on the top ribbon.
- Highlight the header row containing the days of the week (Sunday through Saturday).
- Click the Shading tool (the paint bucket icon) and select a color palette that aligns with your professional style.
- To maintain an authoritative, easy-to-read look, use high-contrast text elements—such as crisp white text over a deep navy blue header.
Structuring Text and Spacing Efficiently
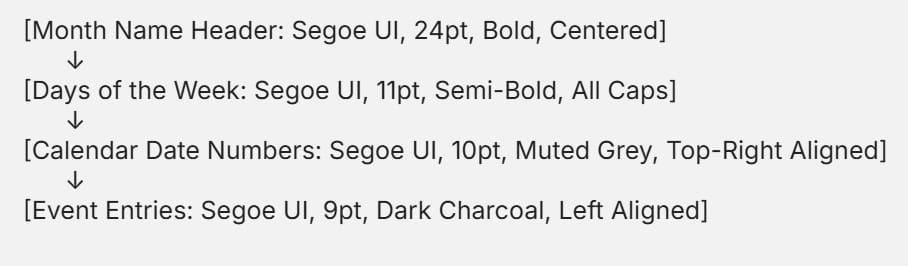
To prevent your calendar from looking cluttered, establish a clean typography hierarchy. I recommend using clean, modern sans-serif fonts such as Segoe UI, Calibri, or Arial for cloud readability.
To create consistent padding inside your days, highlight your entire table, right-click, select table properties, and ensure your cell margins have a uniform buffer (ideally 0.05 inches on all sides). This ensures your text entries never awkwardly clip against the grid lines.
Advanced Management: Team Collaboration and Distribution
One of the greatest benefits of utilizing a cloud-based layout is breaking free from the old workflow of emailing file attachments back and forth.
Setting Up Multi-User Editing Privileges
Imagine you are managing an internal training program. You need your logistics coordinator, Sarah Jenkins, to add classroom locations, and your curriculum lead, Marcus Vance, to drop in assignment deadlines.
Instead of passing around a static desktop file, follow this collaborative sequence:
1.Launch the Sharing Configurations Panel:Top Right Interface.
Click the prominent Share button located in the upper right-hand corner of the Word Online toolbar.
2.Configure Access Permissions and Security:Link Settings Menu.
Open the permissions dropdown. Switch the security setting from a restrictive view-only option to Allow editing to enable real-time collaboration.
3.Target Collaborators and Dispatch Invitations:Recipient Address Fields.
Input the specific work emails for your team members, add a brief brief instruction message detailing their responsibilities, and click Send.
Once they accept the invite, you will see real-time color-coded cursors moving through the document, allowing your team to update dates and track project milestones simultaneously without overriding each other’s work.
Expert Productivity Hacks for Digital Calendars
To close out this guide, let’s look at three advanced techniques that will elevate your template from a basic grid to an interactive dashboard.
- Hyperlink Your Assets: Do not just type “Team Sync” into a date box. Highlight that text, press
Ctrl + K, and paste the link to your digital whiteboard, cloud storage folder, or video conference link directly into the cell. - Build a Visual Status Key: Use text-based color blocks to signal priority or completion states. For example, prefix items with clear tags like
[UPCOMING],[IN PROGRESS], or[COMPLETED]. It keeps your layout clean and scannable without relying on complex, buggy macros. - Utilize the Comments Feature for Drafts: If you are unsure about a specific date or event time, don’t write it directly into the grid. Highlight the cell and click New Comment. This lets you hold a sidebar discussion with your team members directly inside the file before finalizing the schedule.
By choosing a clean Word Online template, organizing it with a strict typographic hierarchy, and leveraging native cloud collaboration tools, you create a central hub for your productivity. It gives you all the structure you need to keep your projects on track, with none of the clutter.
You may also like the following articles:

My name is Carissa Gudino and I am an expert in word online, using Word Online in my day-to-day tasks. In this blog, I will share with you tips and tutorials on how to use word online to its fullest potential. I work for various clients in various countries like the United States, Canada, the United Kingdom, Australia, New Zealand, etc. My tutorials are designed to help beginners, as well as more experienced users, learn new tricks and tips on Microsoft word online. Check out more.